Invoice capture automates the manual, time-consuming tasks involved in the accounts payable (AP) process. By leveraging AI and ML technologies like OCR and RPA, this solution simplifies invoice processing. When invoices are scanned, OCR extracts essential data, such as vendor information, invoice number, and line items.
To run Invoice capture solution following pre-requisite needs to be done
1 Installation
1.1 Invoice capture officially only supports integrated power platform environment
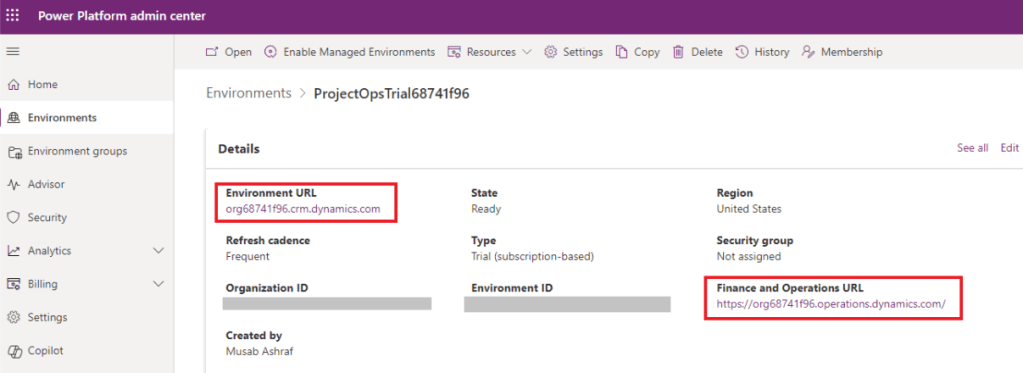
My D365 F&O needs to be hosted on the same power platform on which I am going to instal Invoice capture app. I’ll write next blog on how to get trial environment
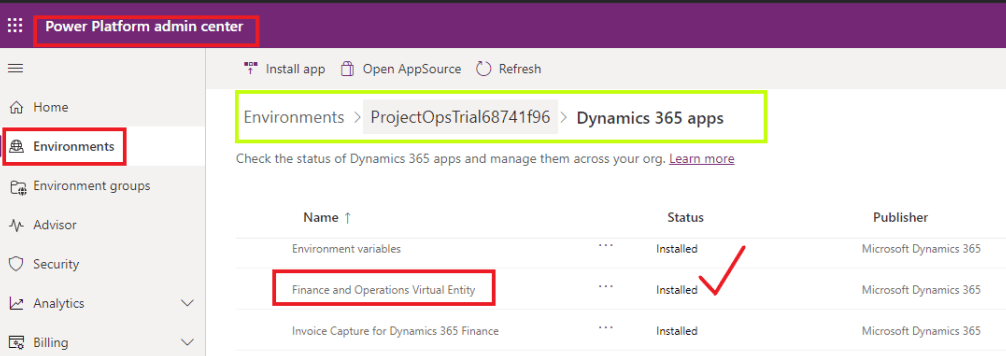
1.2. Ensure that Finance and Operations virtual entity is installed on Power Platform
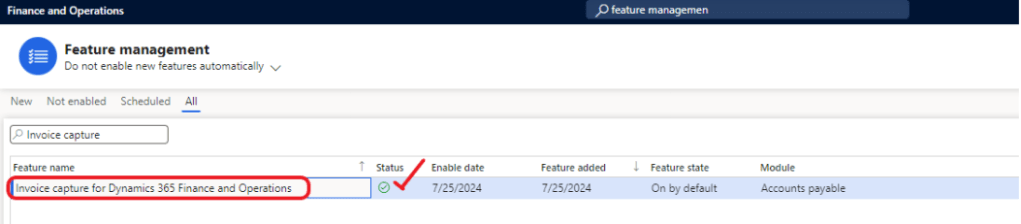
1.3. Enable invoice capture from feature management in D365 environment
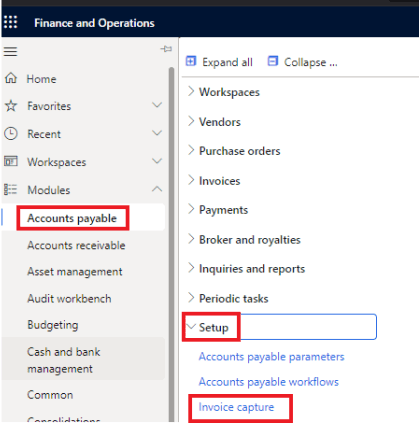
Now to enable some parameters for Invoice capture go to
Account payable > Setup > Invoice Capture
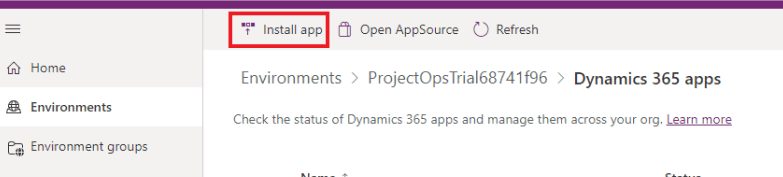
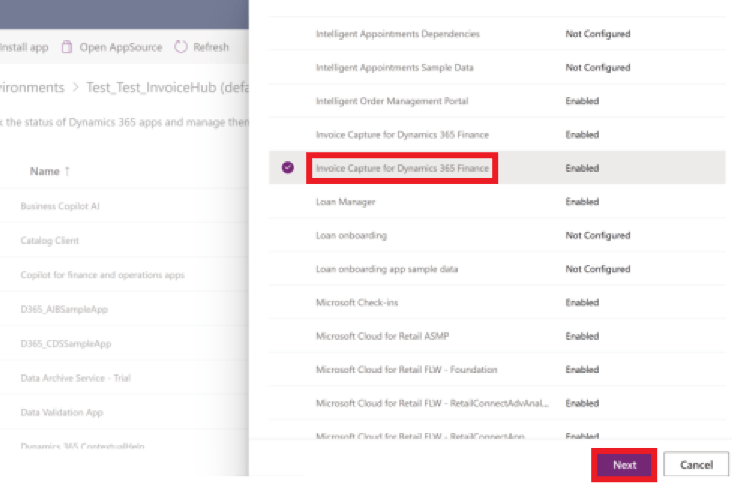
1.4. Install Invoice capture solution in Power Platform
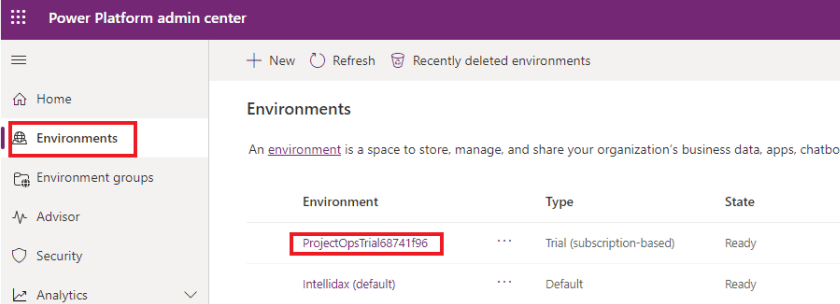
- In the Power Platform admin portal, go to Environments and select the environment.
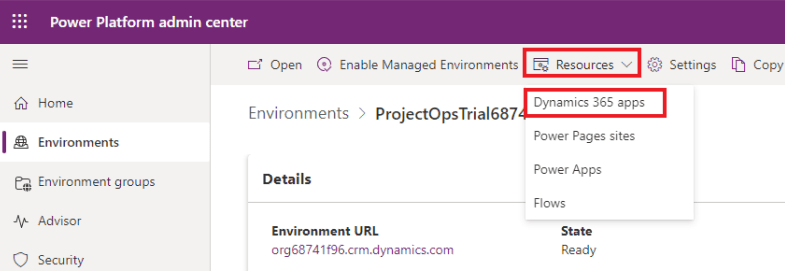
- Select Resources>> Dynamics 365 apps.
- Click “Install app” and choose “Invoice Capture for Dynamics 365 Finance” and click Next
1.5 Assign InvoiceCaptureOperator role to user
The InvoiceCaptureOperator role must be included in the role of user in D365 Finance and Operations settings to successfully run the derivation and validation logic in Invoice capture, and to transfer the invoice to Dynamics 365 Finance.
2. Setup System
After installation is done, we can proceed with the setup
Go to D365 F&O > Click in invoice capture
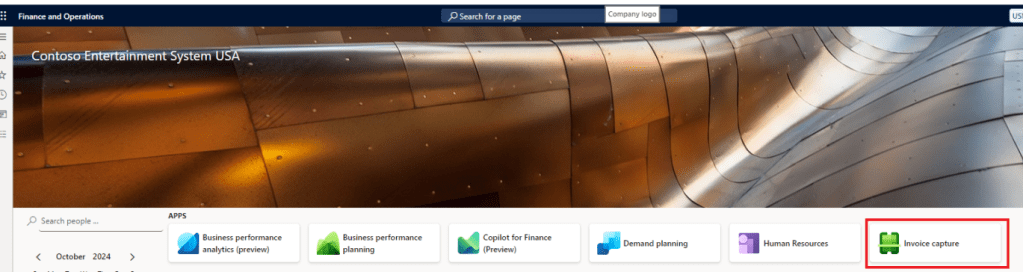
Invoice capture Power app will open. you need to change the view to setup

In system preference, default configurations for using invoice capture is provided.
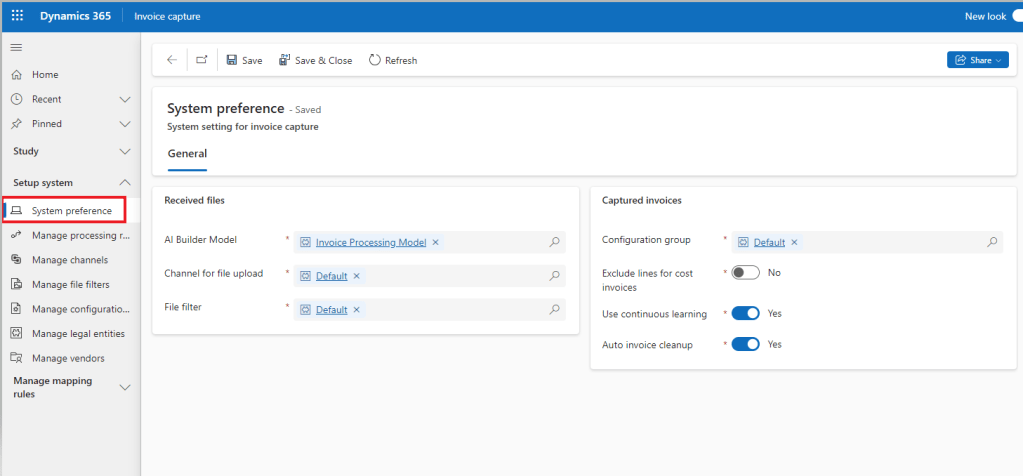
2.1. AI Builder Model : Default model is set to prebuild Invoice Processing Model. We can create our own model by training it on additional sample invoices, tagging fields and defining new fields
2.2. Use Continuous learning: Mark it as yes, as we will be receiving invoices that may not map correctly by our AI model and we need to fix that manually. By doing that our AI model will learn those changes and apply on future invoices
2.3 Channel for file upload: It is set as Default which require us to upload invoice. We can also configure a flow to get invoices from outlook, SharePoint, or Microsoft 365.
To set the Outlook for receiving invoices. Go to
Manage Channels > Click New


2.4 Configuration Group: After deployment, a default configuration group “Default” is assigned. This is an important configuration which categorize the quality of invoice as per model. It assign confidence score which can help us into deciding whether we need to manually review the invoice or not.
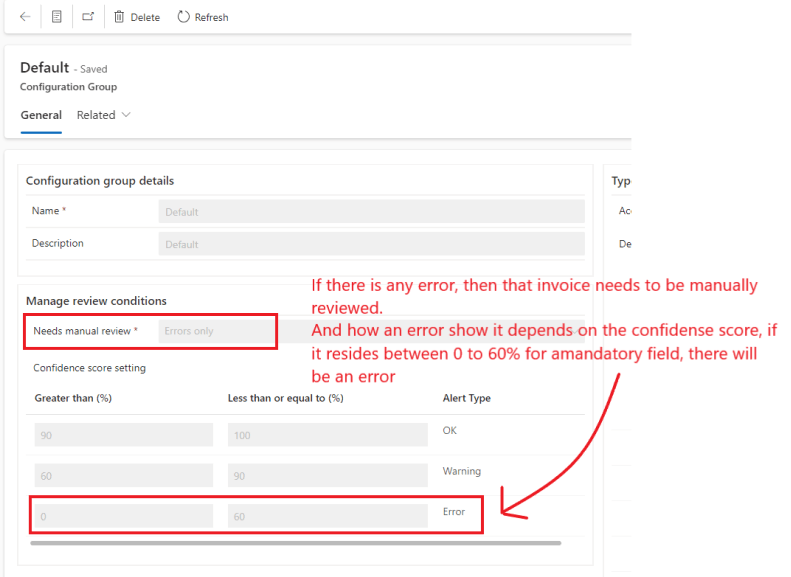
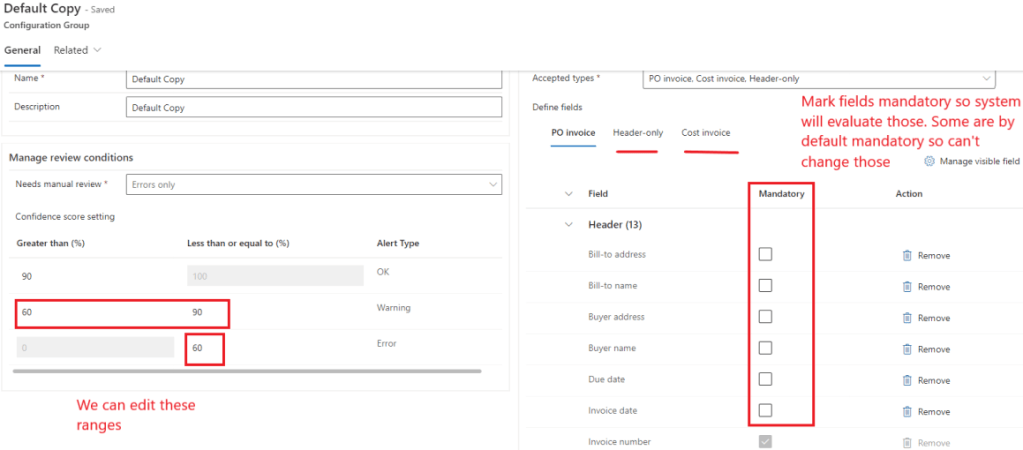
we can change this confidence score by copy the Configuration groups, and defining the mandatory fields
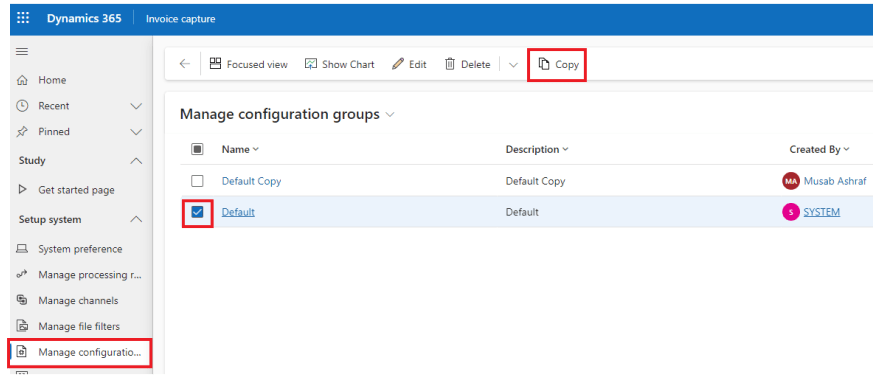
We can create multiple configuration groups and assign it to vendor and legal entities as different vendor follow different layout and context. Invoice capture will follow the configuration group in following orders
- Vendor Account
- Legal Entity
- System preference level
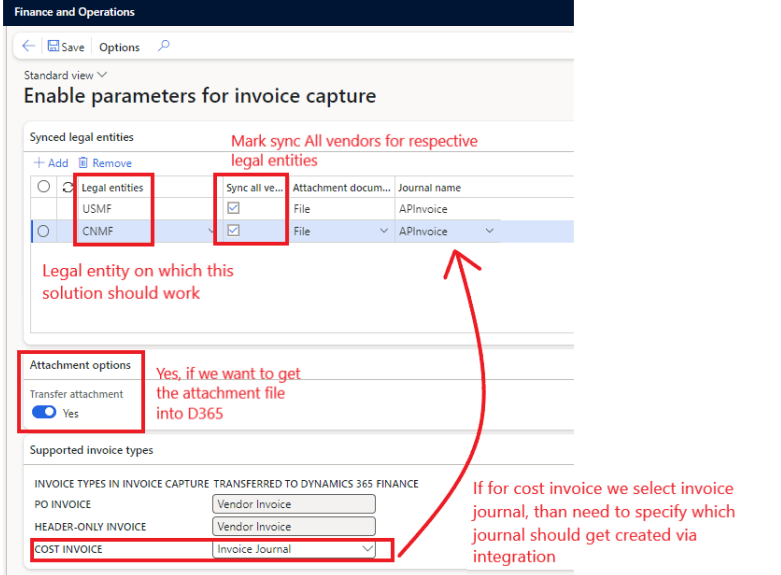
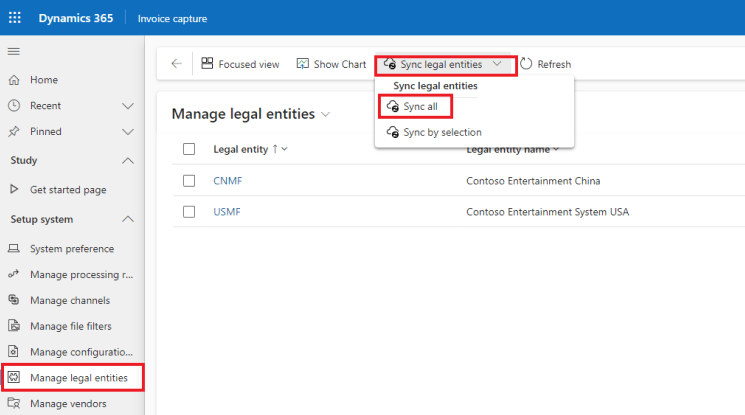
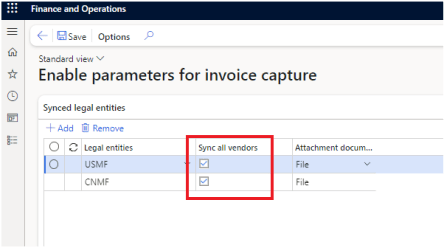
2.5 Manage Legal Entities: So first time we need to Sync legal entities. It will only sync those legal entities which we defined in Invoice capture parameter in D365 F&O.
Go to
Manage legal entities > Sync Legal entities > Sync All
Manage Vendors: First time we need to run initial sync to Sync all vendors.
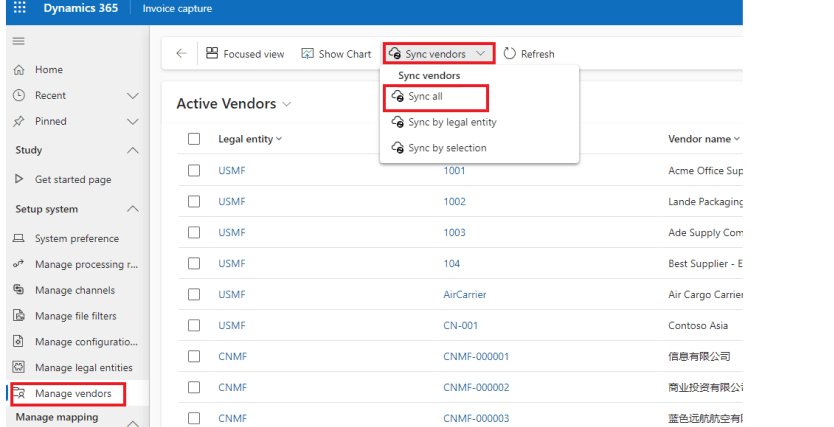
It will fetch all vendors from the legal entities that we set in Invoice capture parameter in D365 F&O.
After initial sync, if we create new vendor in D365 and marked Sync all vendors as yes in invoice capture parameter against a legal entity. the vendor will be auto created here
3 Manage Mapping Rules (Optional)
After setup is done, we may setup mapping rules. It is not mandatory as Invoice capture now supports more advanced derivation. there are four mapping rules
- Legal entities
- Vendor Accounts
- Items
- Expense Types
3.1. Legal entities: it help system understand if the invoice have certain address or name or registration id contain then it should relate to certain legal entity
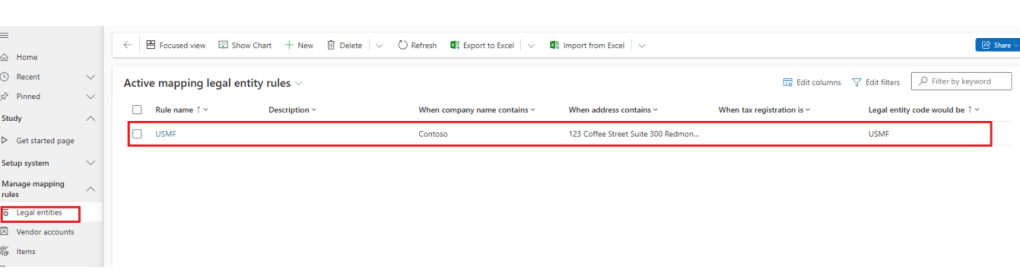
We can contain rule by clicking on New.
3.2. Vendor Accounts: it help system understand if the invoice have certain address or name or registration id contain then it should relate to certain vendor
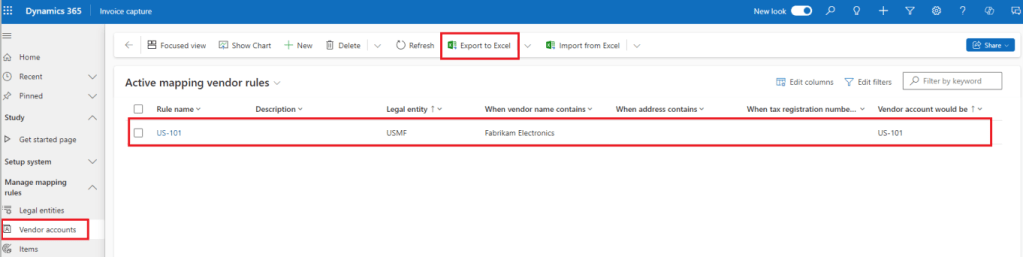
to create new rule we can click on new. But as we have lots of vendor we can use excel export and import functionality

3.3. Items: In item we have the option when we are receiving invoice, so how that Item can be mapped with Item ID in D365 F&O
3.4. Expense Types: We can use this mapping type to map expense lines in invoice with our procurement category.
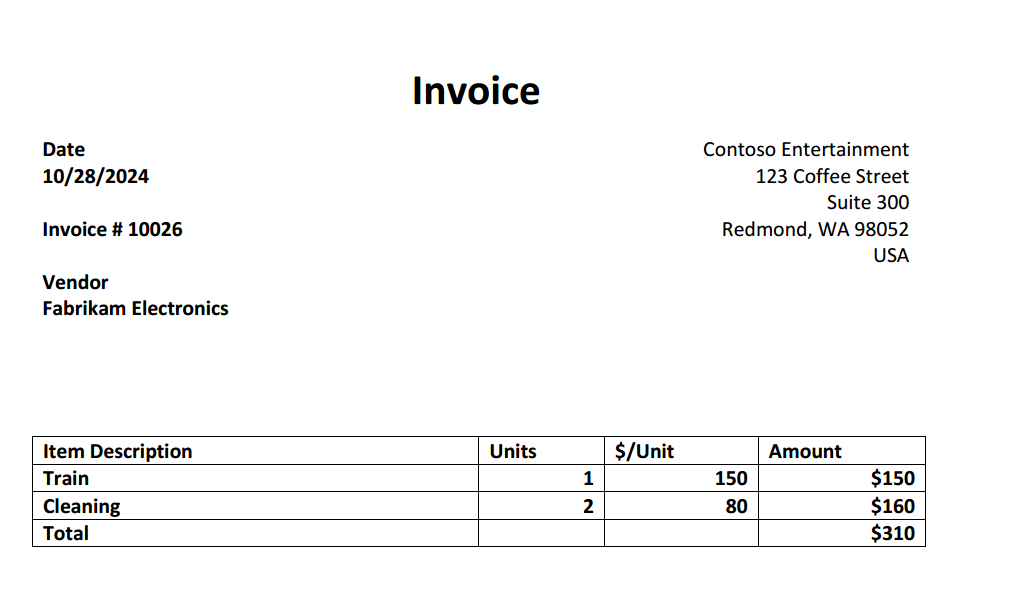
4. Demo
Now as we have setup the environment. I’ve one non po vendor invoice
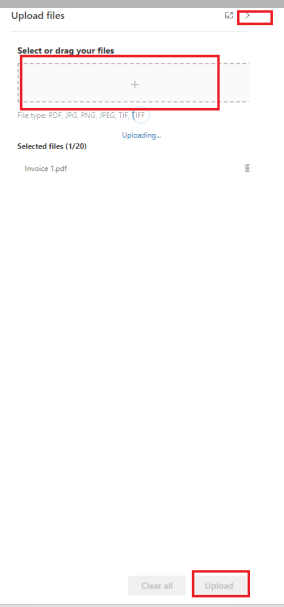
Go to Manage invoice < Received files > Upload files
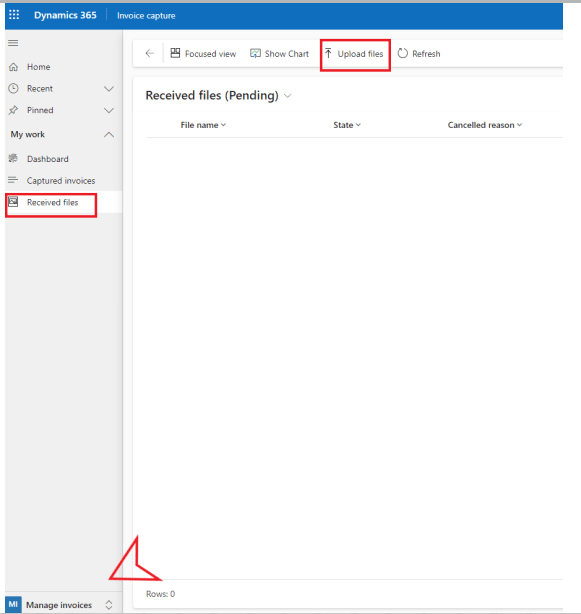
upload the file, after successful message click on cross button at top
Invoice capture is working on the invoice. after some time it will vanish from received files and go to captured invoices screen

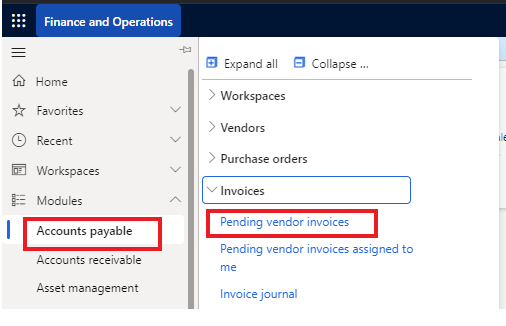
After some processing the invoice will go to awaiting state. a batch job will run and transfer all awaiting vendor invoices to D365 pending vendor invoice

Now go to pending vendor invoice
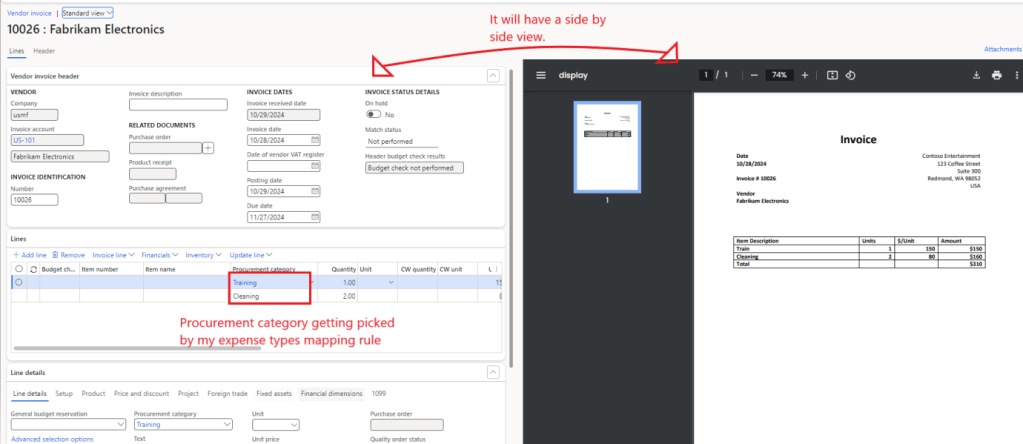
Our invoice now resides in D365

We can see invoice and attachment side by side and also our procurement category in lines.
This is the quick demo about Cost invoice (vendor invoice). we can also use invoice journal as Cost invoice but as per known limitation we will not get lines.
Hope you learnt something new today.
Thank you!

Leave a comment