Budgeting is a critical tool for finance folk to help them maintain financial control over their operations which in turn help them to manage financial health and achieving strategic objectives of a business
Dynamics 365 Finance offers robust budgeting capabilities, allowing organizations to create, manage, and monitor budgets effectively. We can also call these budget transactions in MR for actual vs budget comparison financial reports.
To setup the budgeting we need to set configure following setup
- Budget Dimensions
- Budget Cycle
- Budget Code
- Budget Model
- Budget Control Configurations
- Budget Register Entries
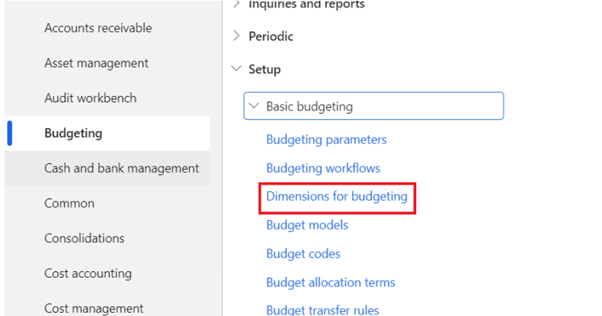
Step 1: Dimensions for Budgeting
We can control budget on dimension level. To enable dimensions for budget control go to
Budgeting > Setup >Basic Budgeting > Dimensions for budget
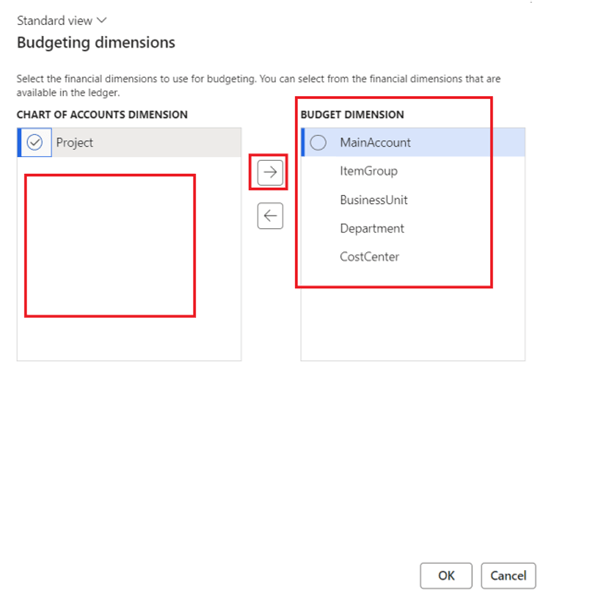
In next screen move the dimensions from left to right on which you want to define the budget and click ok
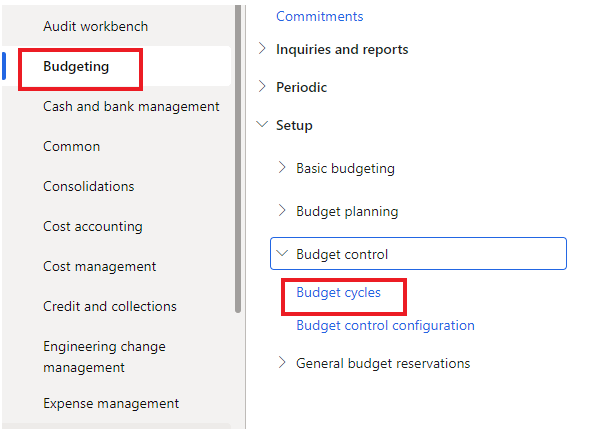
Step 2: Budget Cycle
Budget cycle define the timeframe/length of period for which we need to create the budget. Typically we create it for fiscal years and define the periods in it
for that, Go to
Budgeting > Setup > Budget Control > Budget cycles
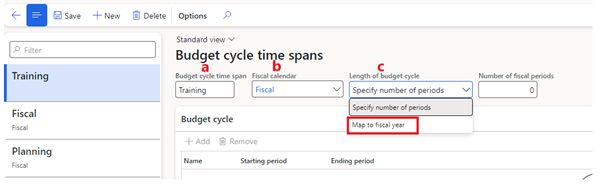
Click on new and fill following
a) Budget cycle time span is just a free text field for identification. I write training in it
b) Here we will select our Fiscal calendar
c) Here we will select either we want to create this budget for some number of periods (We will then need to select number of periods in next field) or for a complete fiscal year. I’ll select Map to fiscal year
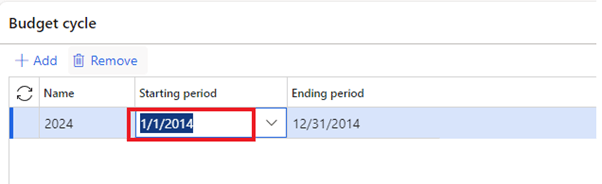
In the budget cycle grid, we will give a name and starting period will be the first date of fiscal year that I want to make budget for. Once I select it my ending period will be auto populated
Step 3: Budget Code
Budget code help us to attach a budget type to it.
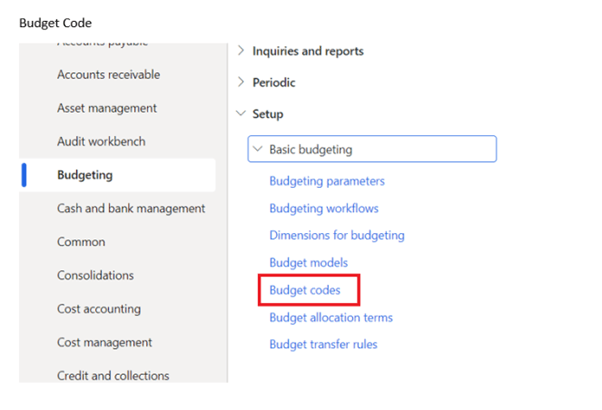
for that, Go to
Budgeting > Setup >Basic Budgeting > Budget Codes
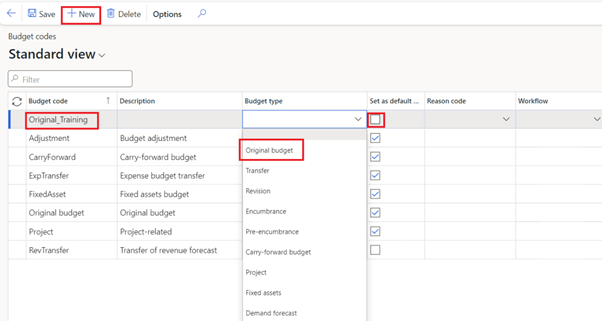
Click on New, In Budget code type a name, We can enter a description to define the budget type and in Budget type we have multiple selection available in drop down
I’ll select the original budget which we use to create initial budget amount. To understand about each budget type click here
Mark this budget as default. There can only be one default for each budget type.
Step4: Budget Models:
Now we need to create budget model.
For that, Go to
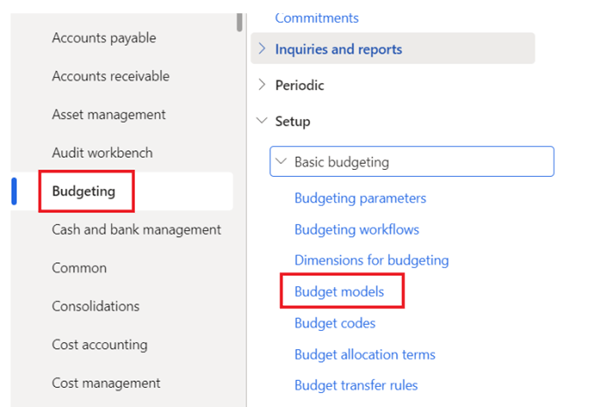
Budgeting > Setup >Basic Budgeting > Budget models
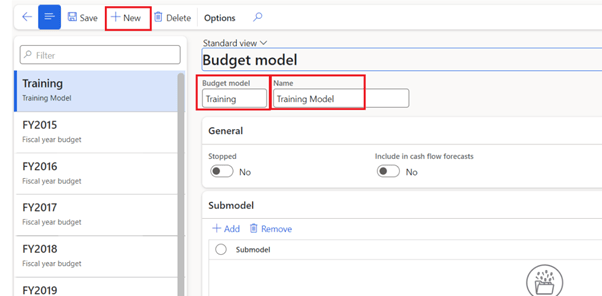
Click on New and Give a code and name, click on save
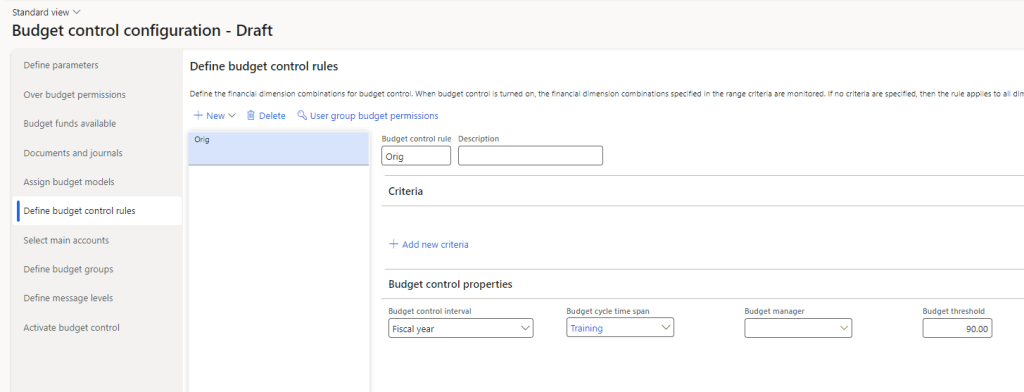
Step 5: Budget control configurations
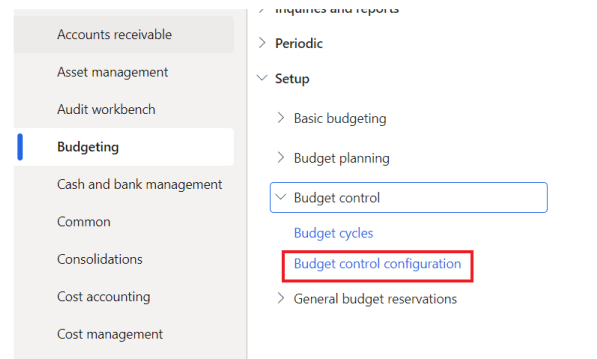
- Click on create draft
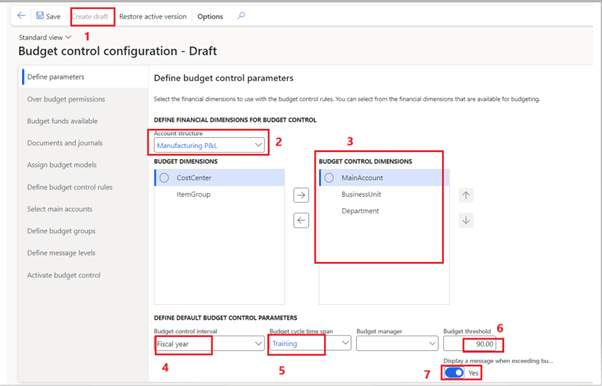
- select the account structure
- In the Budget Dimensions grid, you’ll see the dimensions defined in the Dimension for Budgeting setup. To apply budget controls to a specific dimension, you’ll need to move it to the right side of the Budget Control Dimensions grid
- My Budget control interval will be for complete year
- Budget cycle timespan I’ll select the Training which I created in Budget cycle
- Budget threshold can be setup at a certain percentage to give us a warning message when our actuals are going to cross that threshold. Our actual limit is 100% so it is not going to restrict us when reaching 90%
- If we set a Budget threshold and want to see the warning while crossing the threshold, we need to turn this as Yes
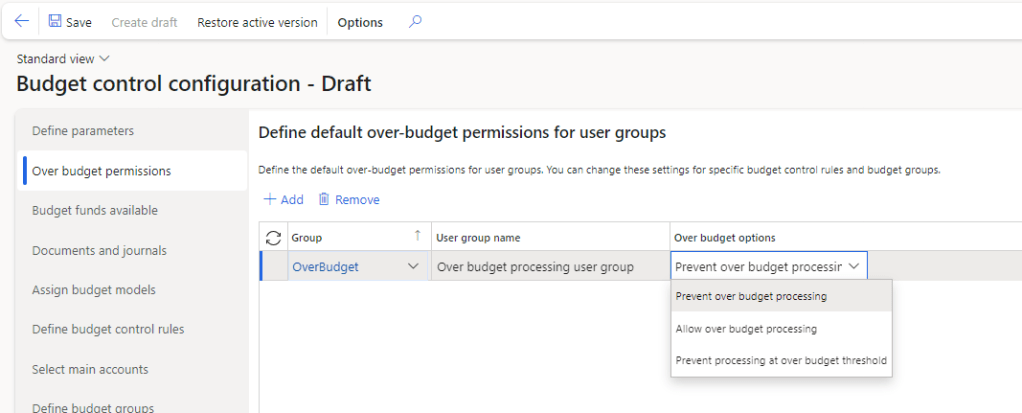
Over budget Permission have three options
- Prevent over budget processing. It will restrict the user group defined to prevent them to post transaction that going beyond budgeted amount
- Allow over budget processing. It will allow the user group defined to post transaction even if budget is fully consumed
- Prevent processing at over budget threshold. It will restrict the user group defined to prevent them to post transaction that going beyond budgeted threshold (90%) that we defined earlier
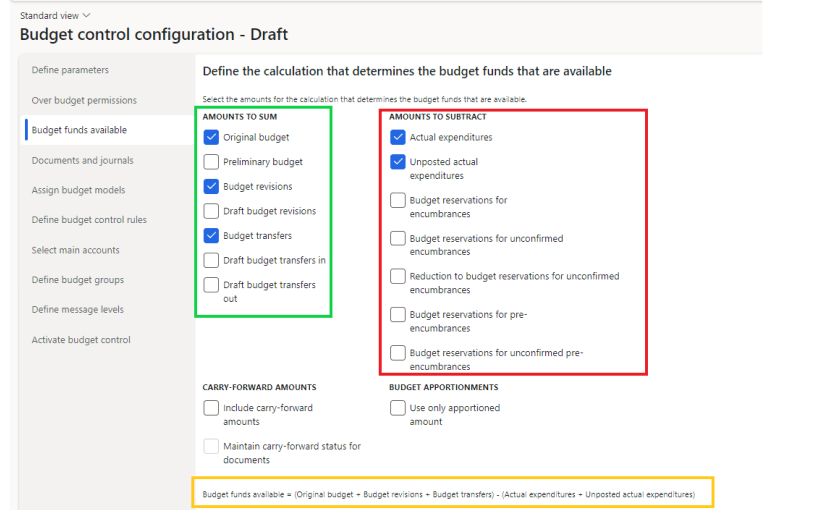
In Budget fund available we will define the basis on which the available budget calculation will be performed so system know when to restrict the posting or give threshold warning.
In Green box we will select the sources of budget, I’ve selected original budget, Budget revision and budget transfers. All these will be sum up together
In Red box we will select which transaction will consume our budget. I’ve selected actual expenditure (Posted) and unposted actual expenditure (created but not posted). These red box checks will sum up together
In yellow box you can find the formula, Selections in Green Box – Selections in Red box
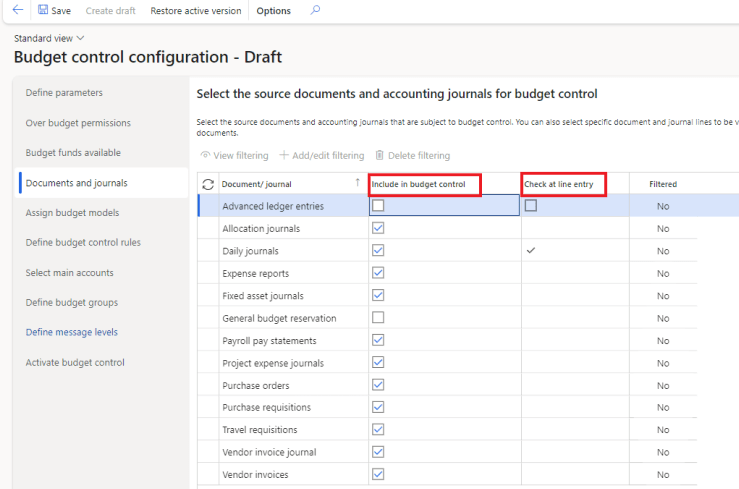
In Document and Journal, we will select that on which document we want to apply this budget control. Under Include in Budget control we will mark the require documents.
If we want the budget to get executed on line level too we can mark Check at line entry against that document
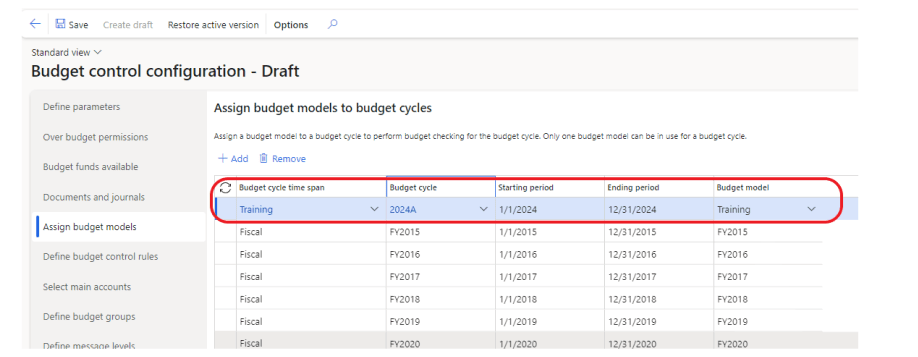
In Assign budget model we will assign our setup like time span, budget cycle and model
Create a budget control rule. if there is a focus on the expenditure or range of expenditures for a department, you can use the settings on this tab to define and evaluate those expenditures. I’ll leave criteria as blank
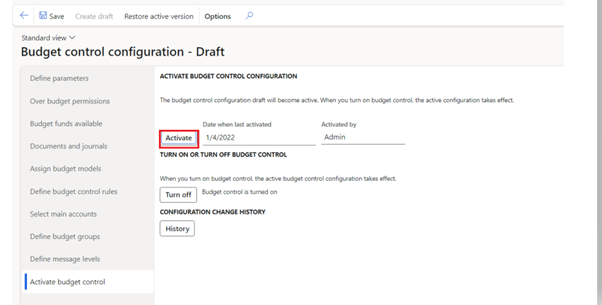
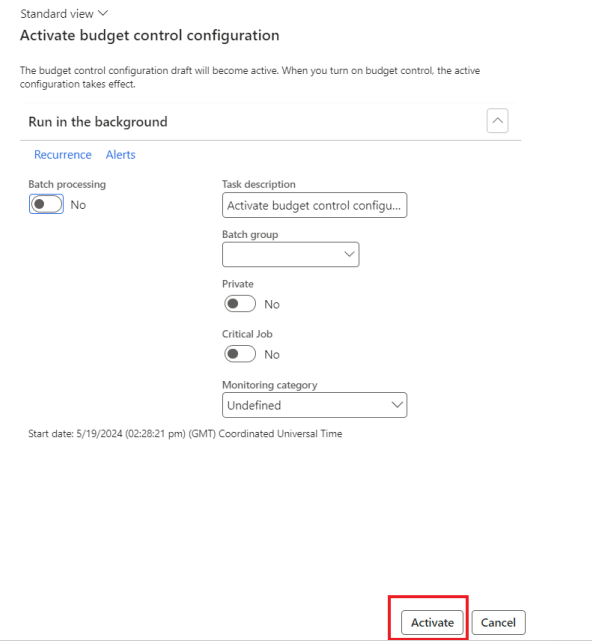
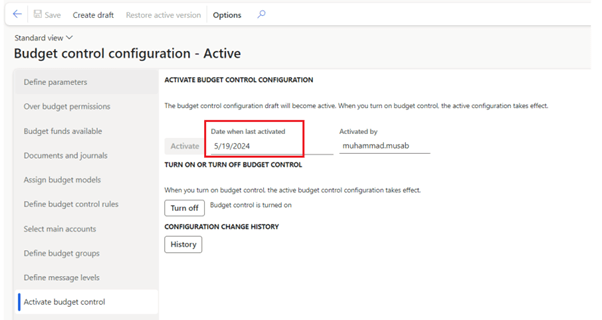
In Activate budget control, Activate the budget
Step 6: Budget register entries
After all the setup and configuration is complete, We now feed D365 with budget. For that we will create the budget register entries.
Go to
Budgeting > Budget register entries

Click on New
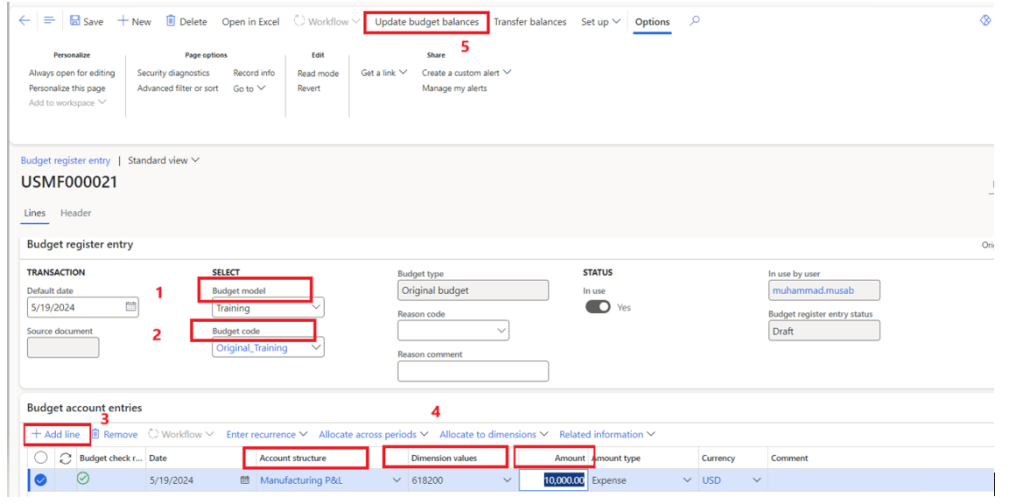
- Select budget model
- Select budget code
- Click on Add line
- Select account structure, Dimension Value on which to assign budget and Amount of Budget

We can create the budget register entry in excel format and upload here in lines, for that click on the Open in excel from the top ribbon, a format will be exported. Populate the entries in it and publish back in D365
Demo
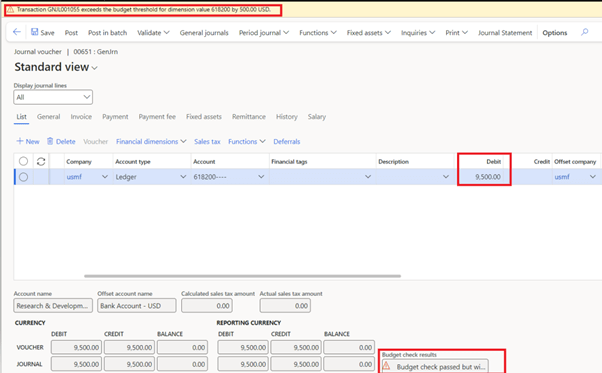
Now as our budget is all set for a Main account. lets create a Daily journal for it.
As I’ve budget of 10,000 for Main account 618200 and entered 9,500 in Daily journal. It is withing our budget but exceeding the 90% threshold. So the budget check will pass but a warning will popup
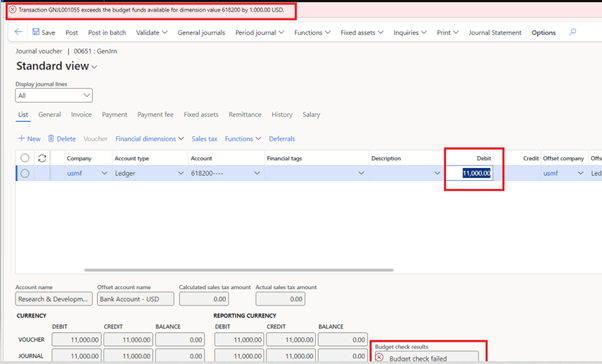
But if I try to create an expense of 11,000 my budget check will fail and it will also give me error that I’m going over budget by 1,000
Thank you!!!

Leave a comment