
Bank reconciliations can be a time-consuming and error-prone task. Microsoft Dynamics 365’s Advanced Bank Reconciliation feature automates this process, saving your treasury team valuable time and improving accuracy.
Microsoft has recently introduced several new features to Advance Bank Reconciliation. To provide a clear understanding, I’ll break down the process into multiple parts. This initial blog will focus on essential configuration steps to set up a basic version of Advance Bank Reconciliation.
Step 1: Import the Advance Bank Reconciliation Model and Format:
First we need to import the advance bank reconciliation model and format into reporting configurations through Microsoft repository. for that go to
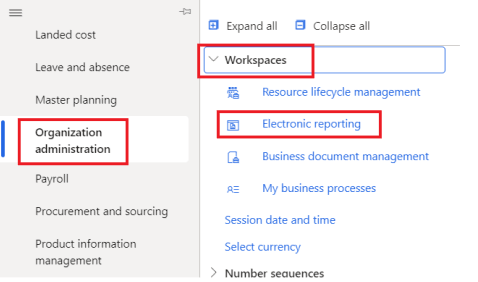
Organization administration > Workspaces > Electronic reporting
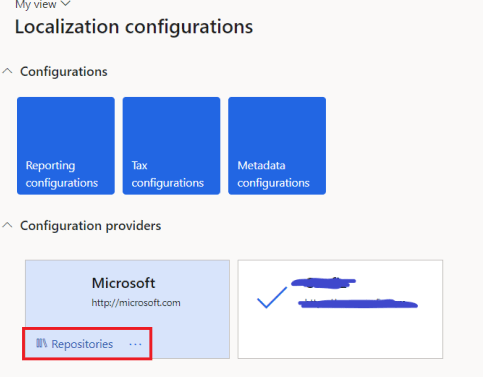
Under configuration provider, click on repositories in Microsoft box
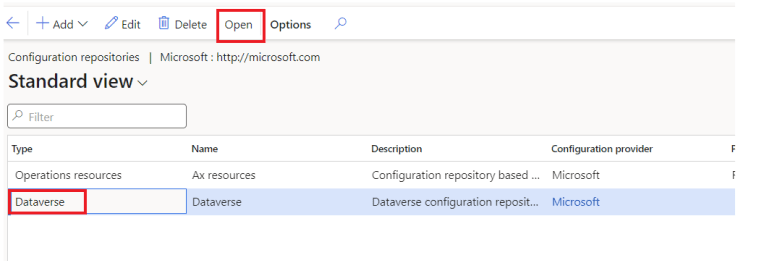
Select Dataverse and click on Open
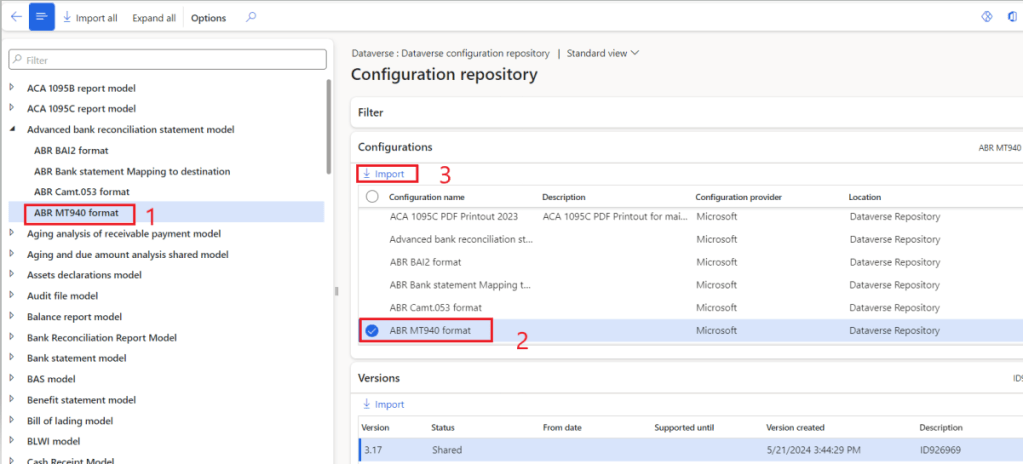
Search for Advance bank reconciliation statement model, under that there will be multiple format like BAI2 (Usually used in US region), MT940 (Commonly used format).
We will select MT940 select the ABR MT940 format and click on import
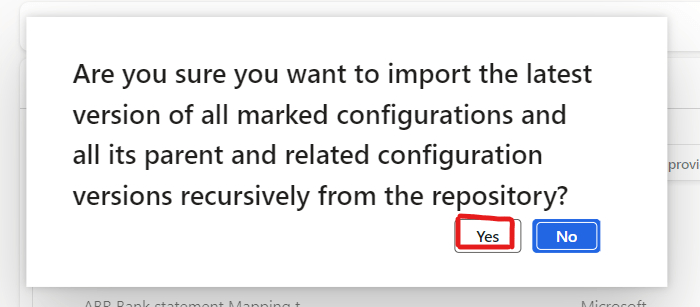
simply click on Yes on the next confirmatory pop-up
Once the process complete, import successful message will pop-up

Now we will go back to Electronic reporting workspace again
under configuration, click on reporting configuration
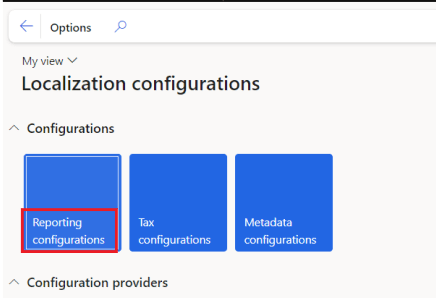
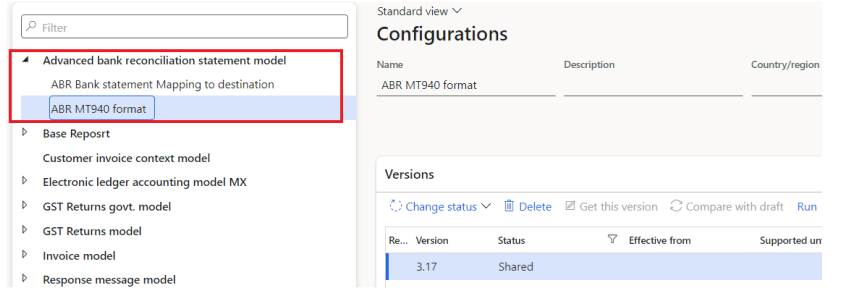
You’ll find ABR MT940 format in the configuration, which mean now we can setup the advance bank reconciliation on Banks
Step 2: Setup Bank Statement Format:
Once we import the MT940 format in electronic reporting, we need to create set this format in Cash and bank module
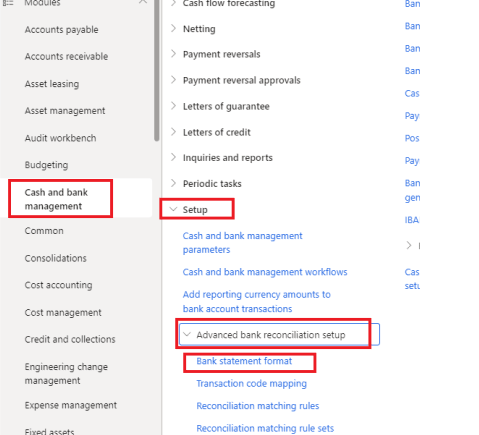
Go to
Cash and bank management > Setup > Advanced bank reconciliation setup > Bank statement format
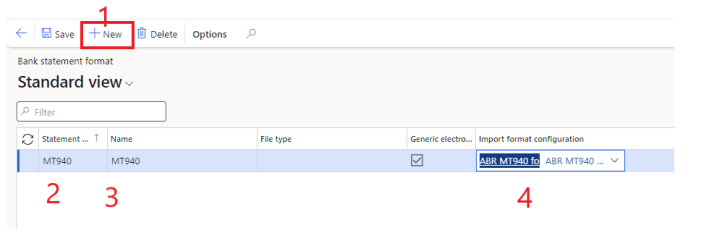
Click on New > Give name to statement format and Name field > in import dropdown select the ABR MT940 format that we imported in electronic reporting configurations
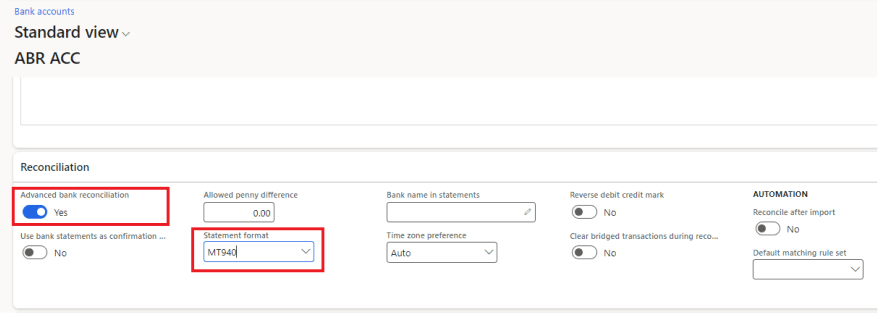
now we need to set this format on a bank account, Note that we can have multiple format imported like BAI2 and MT940 and assign it to different banks.
In Bank, we will go to Reconciliation fast tab and select the statement format that we defined above
Step 3: MT940 Transaction code mapping:
MT940 is a standardised financial format used in SWIFT networks for bank statement. whenever a transaction flow in or out from bank through different channel like check, ACH, cash or Wire it assign the transaction type identification code.
As we have already created Bank transaction types and refer it to the Method of payments. SO, whenever we do any transaction using our defined method of payment it store the transaction type in D365. Therefore if we map MT940 transaction type with D365 Bank transaction type it will help us in creation of reconciliation rules. (Note that this mapping is not mandatory, but to make reconciliation more accurate it is very useful)
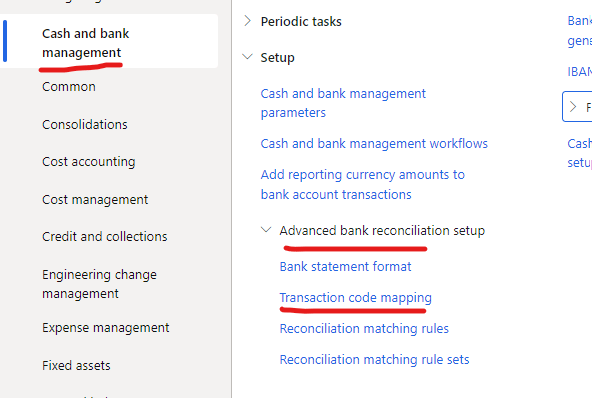
We will go to
Cash and bank management > Setup > Advanced bank reconciliation setup > Transaction code mapping
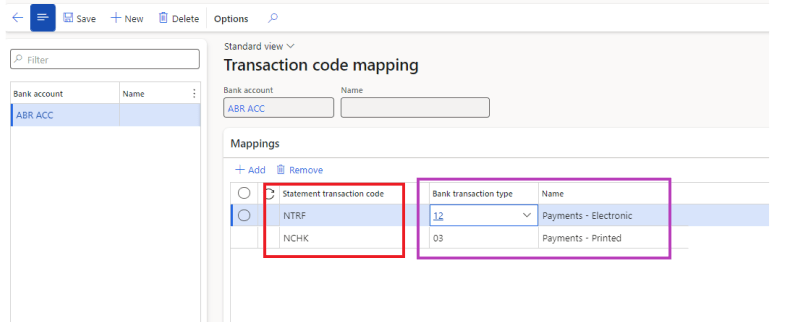
In the bank account field we can only select that bank account on which Advance bank reconciliation is marked as yes. In grid the red outlined will be the transaction type code that will be in MT940 and purple outlined will be the transaction type that are in D365, there are many type of transactions but I choose only 2 for now.
NTRF = Transfer
NCHK = Check
Mapped NTRF with 12 (Payment – electronics) and NCHK with 03 (Payment – printed)
Step 4: Reconciliation Matching Rule setup:
These rule give context or direction to D365 about how an amount in Bank statement can be reconciled/matched with the amount in D365 transaction. I’ll try to create three basic rules for now which we can use in this part.
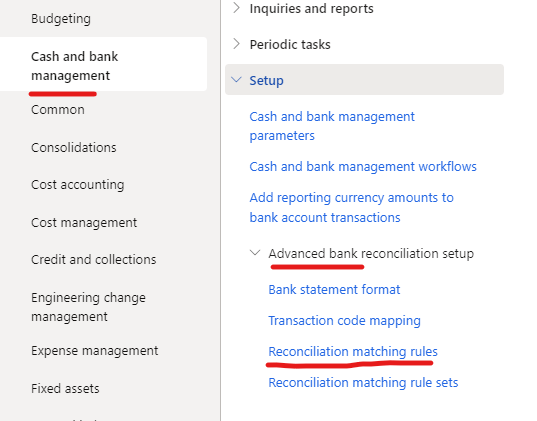
for that, go to
Cash and bank management > Setup > Advanced bank reconciliation setup > Reconciliation matching rules
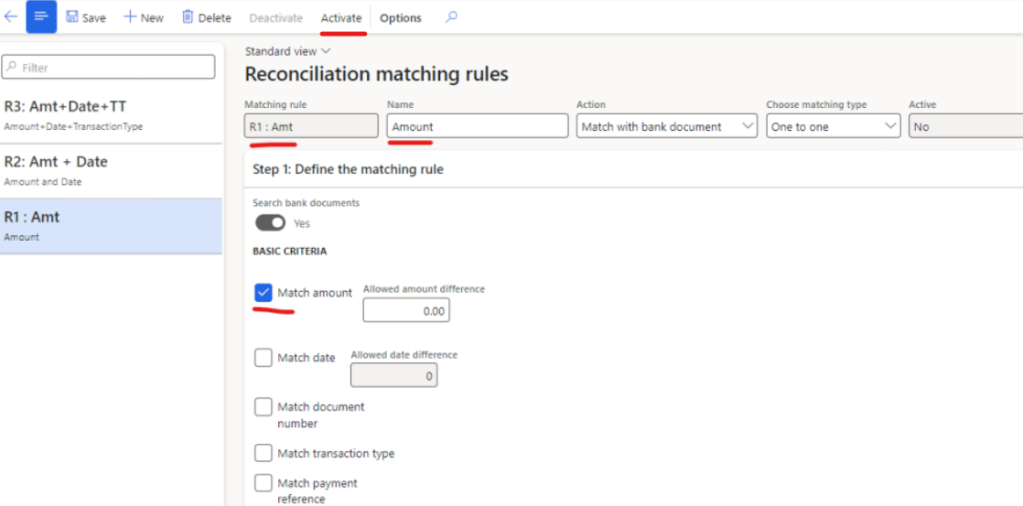
First Matching rule
Give matching rule a code and a name. Action will be Match with bank document and matching type is One to one (In next blog I’ll try to explain further about different selections in Actions and Matching type)
I’ll only mark Match amount in this rule. Meaning if amount match in Bank statement and D365, then that transaction will be considered as reconciled
Activate the rule
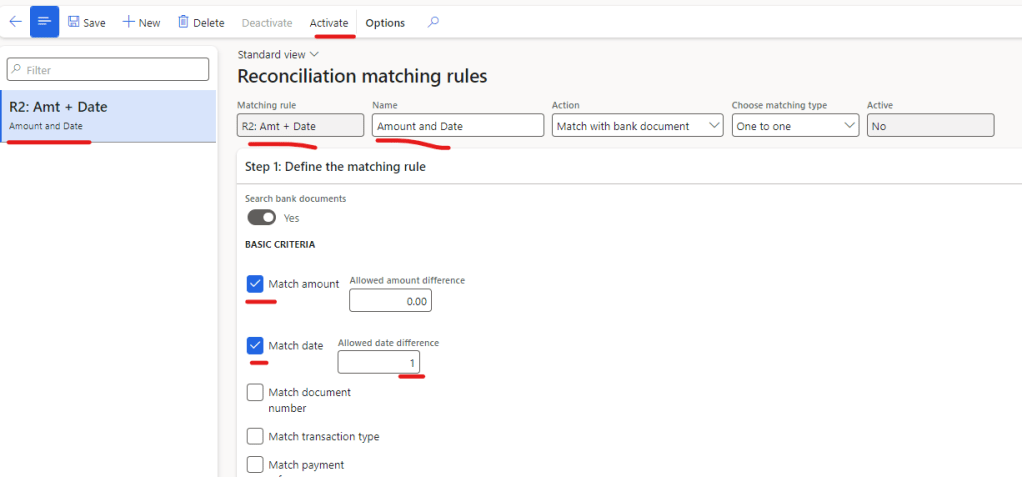
Second Matching rule
Give matching rule a code and a name. Action will be Match with bank document and matching type is One to one
I’ll mark Match amount and Match Date in this rule. Meaning if amount and Date of transaction match in Bank statement and D365, then that transaction will be considered as reconciled. I’ve allowed allowed date difference as 1 which mean that even if there is +/- 1 day difference in D365 transaction date and Bank statement date, rule will consider that transaction as reconciled
Activate the rule
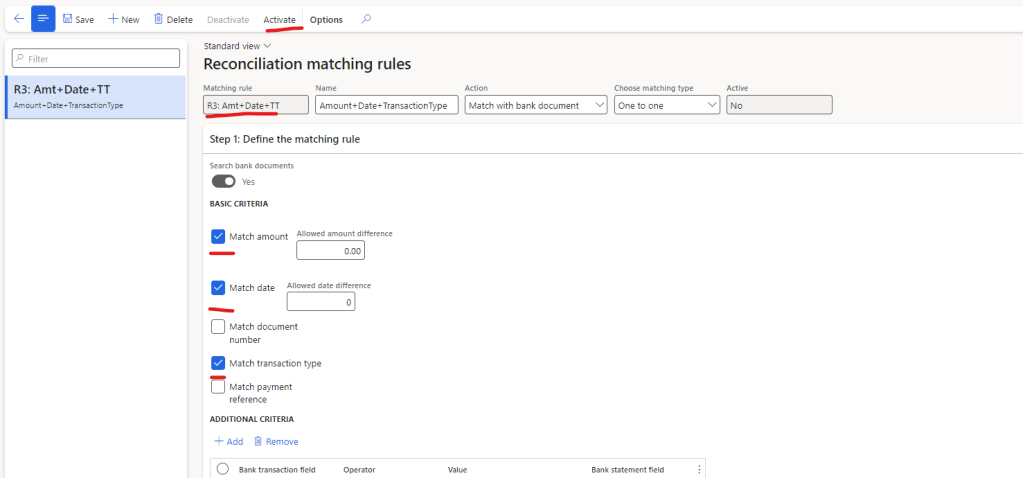
Third Matching rule
Give matching rule a code and a name. Action will be Match with bank document and matching type is One to one
I’ll mark Match amount, Match Date and match transaction type in this rule. Meaning if amount, Date and transaction type of transaction match in Bank statement and D365, then that transaction will be considered as reconciled. We can also allow +/- difference of date in this rule.
Activate the rule
after the rules have been created we can either now use these rules for reconciliation or create a rule set which will run in a certain order (which we define in rule set)
I’ve created a Base rule set and stacked the priority from R3 to R1, R1 being the lowest priority rule.

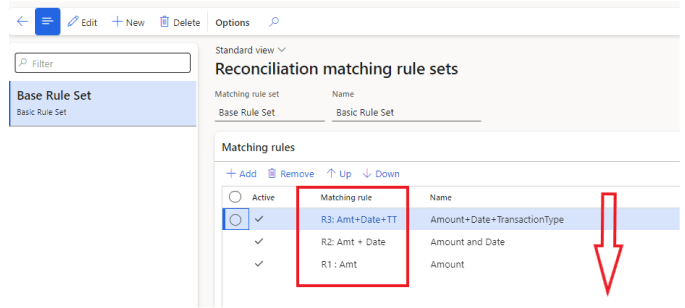
If we don’t create rule set, we will need to tell D365 which rule need to run while reconciliation, if some transaction don’t get reconciled in that specific rule, we can run the next matching rule for unreconciled transaction. But if we create the rule set, then D365 will auto evaluate the transactions on all matching rule (If a transaction isn’t reconciled by one rule, it will be evaluated against the next rule in the set)
Step 5: Reconciliation:
Now we have completed the basic setup for advance bank reconciliation.
We know need to import the bank statement that we get from our bank in MT940 format
For this demo, I’ve created this format
:20:10162024
:25:123456789
:28C:1610/1
:60F:D241015USD50000,00
:61:2410151015CD2359,74NCHK
:61:2410151015CD2540,32NCHK
:61:2410161016CD9116,44NTRF
:61:2410161016DD2911,40NCHK
:62F:D241016USD38894,90
:64:D241016USD38894,90
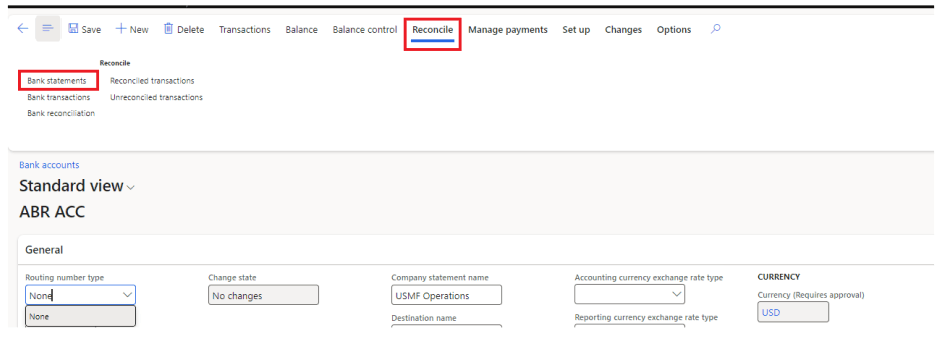
We will go to Bank account on which Advance bank reconciliation is marked as yes, click on reconcile and then select bank statment
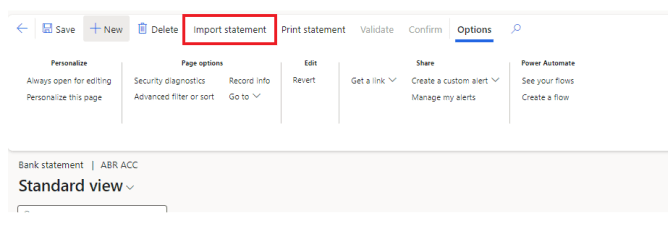
In next screen will click on import statement
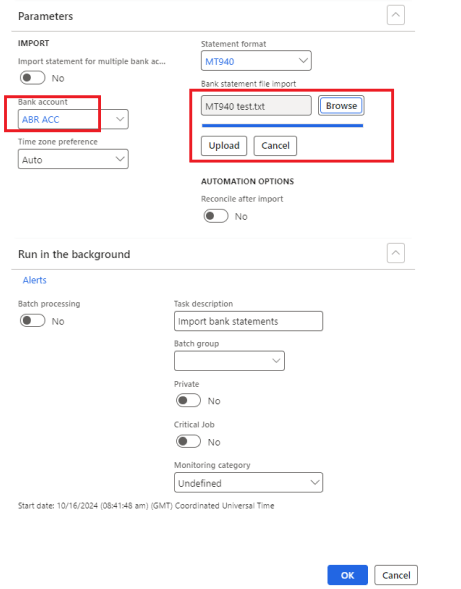
Now we need to select our bank account, and browse the MT940 file that reside in my laptop, click on upload and click Ok
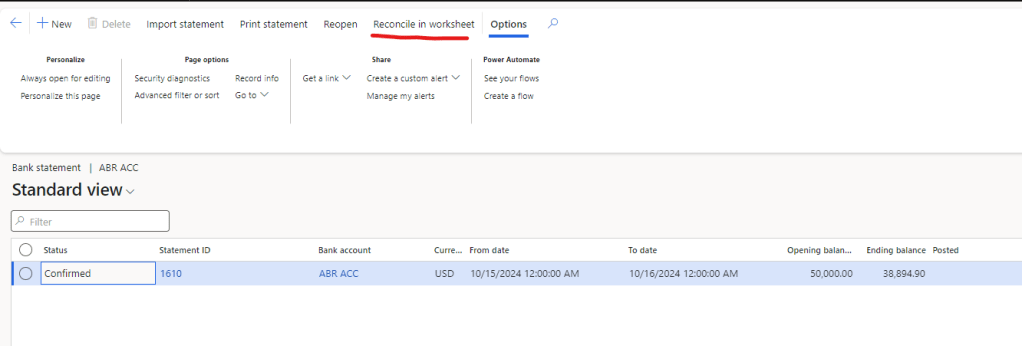
once imported we will validate it and confirm the statement
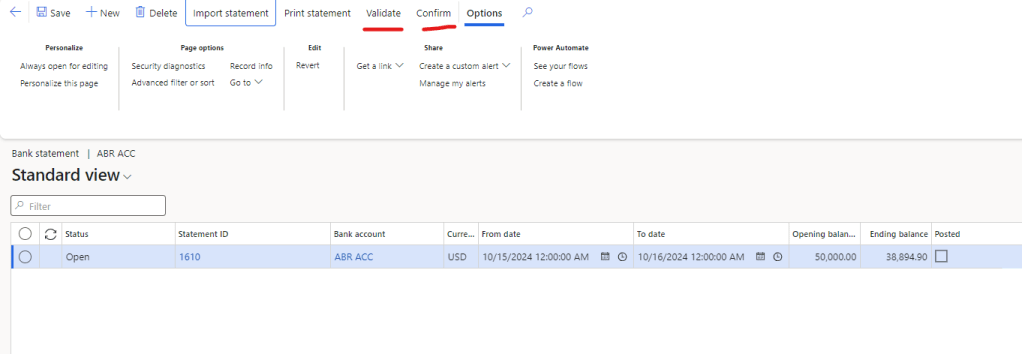
Once confirmed, Reconcile in worksheet menu will enable. Click on it
Now click on new, and then click on worksheet

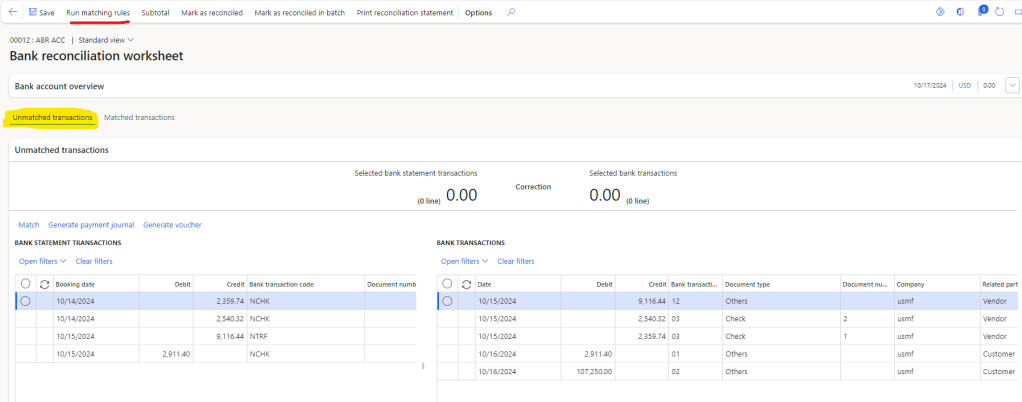
In the left grid is showing the transactions which we imported through MT940 and right grid is showing our D365 bank transactions.
This is the view of unreconciled transactions
Now click on Run matching rule
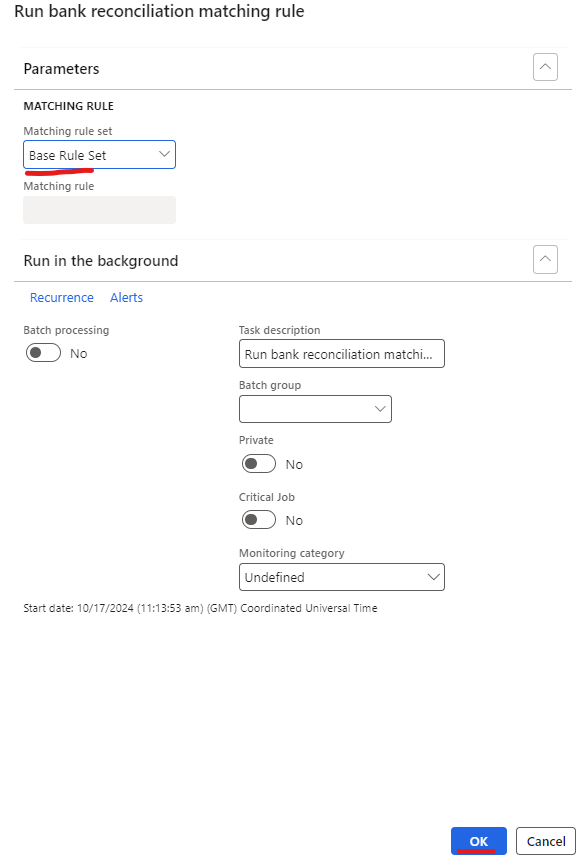
We will have two options, either run the Matching rule set, or select a specific matching rule to run
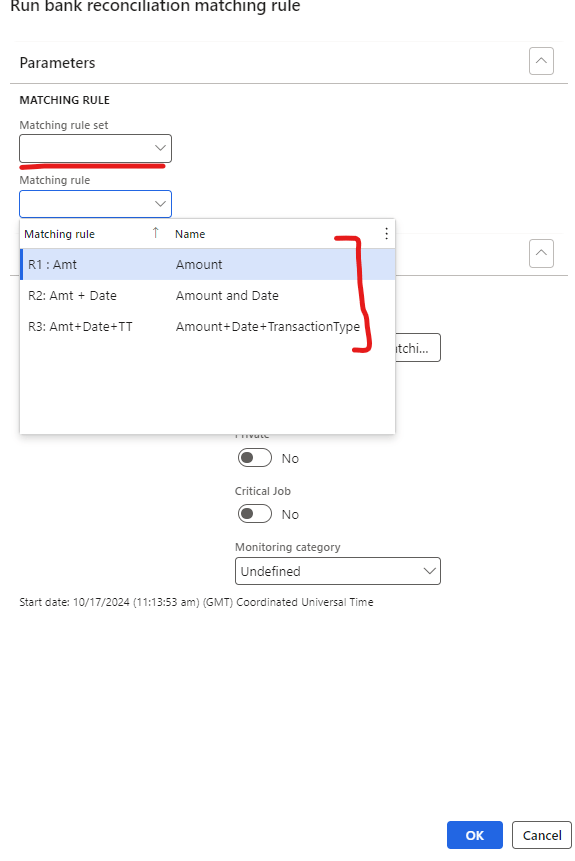
I’ll select the Matching rule set and click on Ok.
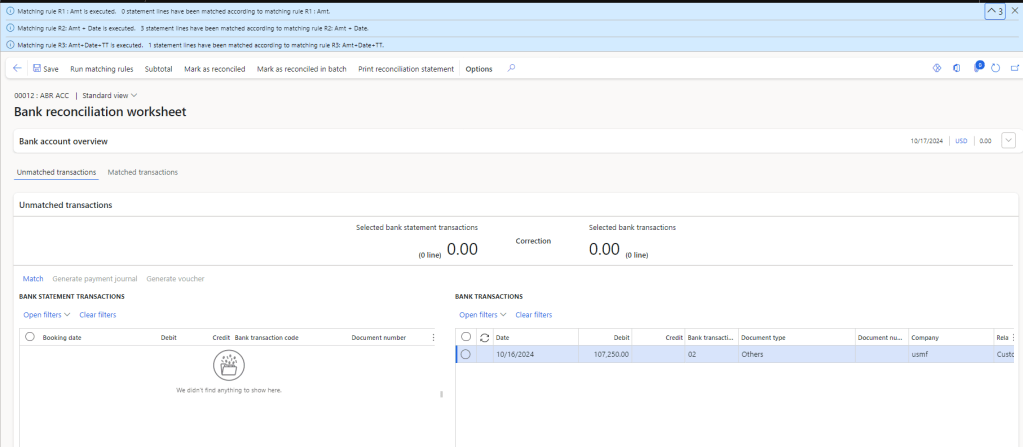
Now once the reconciliation complete, the grid will transfer the reconciled transaction to Matched transaction view.
If we read the success message, we can see that D365 executed R3 first and reconciled one transaction, then executed R2 and reconciled 3 transaction, then executed R1 but didn’t find any matching transaction. This is why matching rule set is useful as compare running to specific rules one by one
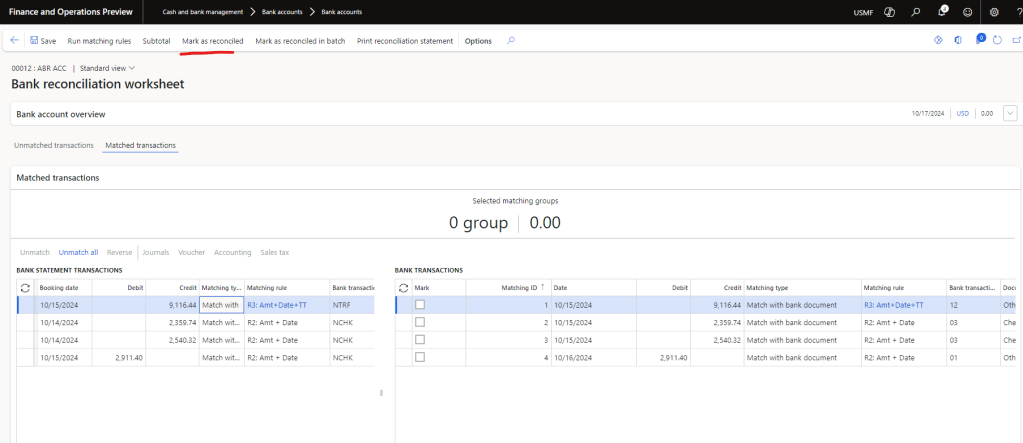
Now if we see the Matched transaction view, we can see the matched one to one transaction and the rule against which it is matched
If everything is fine, click on Mark as reconciled
if we go back to bank statement, we can see that the status of the statement is now reconciled

The good thing about Advance bank reconciliation is that after configuration and setup, we can automate the Step 5 (Reconciliation). System will import the file from SharePoint folder, process it, validate it, confirm it, run the matching rule set and mark the statement as reconciled. I’ll try to cover this automation in my coming blogs on Advance bank reconciliation.
Thank you

Leave a comment